As i had cut my axe sheath pieces juts the other day,yesterday i started to make one. this is for my old Billnäs axe mentioned here already before.
1.
I made a pattern of sheath,into some piece of paper.Istarted it out my trying to draw the handle cross-section to paper,of the joint of the head and handle. After this is i transferred pictures of the blade on both sides of the previously drawn picture of the joint-area,or eye as we call it. There has to be two wedge shaped areas too,between the drawn sides of two sides of axe blade as the shape of axe head happens to be wedge like and the sheath will be far too thin and wrong shaped without adding these wedges,on bottom and on top of the sheath,with this method. If you would be doing sheath from two separate side pieces of eather by either sewing or riveting,you can do it without wedge parts,just remember to add good amount of extra material on both sizes so that the riveted leathers will have enough material to allow the blade slide between them. Then i started to think about the actual shape and funtion of the sheath. This was to be simple without any decorative cuts or extra pouches,or thoug i was tempted to make a hidden firesteel holder on the backside,and still i could do one if i wanted to add it later on. Well i drew a coarse flap to this now,and then i cut open the eye / joint part,so that i could fit the paper template over the axe to see how the flap would look and work. I had to make this opening bit bigger to allow the handle slide thru it snugly. Oh hey in this picture youll see my whole pattern in the actual leatherpiece,and if you look it you'll notice the two parts behind the axes butt,under the hammerhead,remember to add these to yours too. The smaller will turn up,under the bigger next to it,which again will be folded around the hammerhead,forming the closed end over the axe's butt. You can offcourse do this later from separate piece but i like to make these with as few parts as i can,without too many rivets and sewn seams. Less parts,less problems and less to repair. The bigger of these two small flaps under the hammerhead,can be on either side of the smaller. To be honest,it would look better if i too would have made it on the opposite side,this way the seam would be on backside of the sheath,not on front. But its matter of taste too...and luck,and....yep:). Think & draw before cut,i'd say.Well after the paper template starts to be in desired shape, copy it to leather and cut it,but remember to add some 15-20 millimeters,to the sharpened end of axe,so you can actually have it closed by sewing and/or riveting.If you dont remember,this is crusial,and forgetting this will easily make the whol project as waste of good leather and time and ruin your day.Its always better to leave some excess material at first than cut it too close to actual size.
Anyway,now it should look like this:
2.
Now you can do your decorations too if you want to,and use sandpaper already to trim the leathers edges carefully without scratching the smootht visible side. Both of these can be done after the leather has been put under hand-warm water for a while. Dont submerge it,just rinse it so that the water wets it throughly and then shut the water,if its too wet the patterns wont copy to leather so well. One good trick topour the water on the raw side only,and let the water suck in so the visible smooth side tourns out wet and dark,and immediately after this,its time to draw your fine goose,moose and spruce. You just remember to imagine the final shape of the sheath and fit the decorations to this image. I Only scraped off some quick,simple stuff into flap part. Don be afraid of hardcore enthusiast leathercraft topics saying that you have to have any hard to get expensive toolingg items,no sir,just about anything can be used for tooling,from teaspoon ends,to keys,as long as its not too sharp,so it wont cut through the surface,but presses the patterns in instead.

Then i scrupped on some leather dye,this was a mix of leftover red,brown and hint of black. the dye spreads pretty nicely when the leather is still moist,and wont leave obvious stains as easy as on dry leather.
Now,it was like this:
Dye it allover,that is:)
3.
At this point i left the leather to dry for a while and made a belt loop. Nothing fancy,just a robust loop,about 50mm /2" wide and it will fit over duty belts too,as well as traditional sami-style belt too. The straplike un-dyed piece is there just to keep show you better the horisontal cut i made. Its made because i wanted to try out how it would work,as on some finnish packs,atleast on Savotta's pack theres this place for axe,between sidepocket and the main compartement,where you can slide your axe in and above this theres a square shaped leather stitched on,for attching something,but it has the strap holes cut horisontally. So maybe this way i can attach the axe sheath into the backpack,with a strap that will run throug both,and by doing this,i can just open the axe sheath flap,remove the axe and use it,without having to carry the sheath too,and it also secures the sheath from droppin to snow and such.
Oh hey the upper side of the loop,overlaps the underlying,making it just a bit cleaner looking. Just a Bit.
4.
Now it was time to start to do some fitting again and marking and punching holes for rivets and seams. Theres not much to tell about,just keep the parts in place,so they face each other like they will in the final result and youll do just fine. Keep the stitches tight too. In making you will,time after time,learn to think about in which order you can make the joints the easiest way. I like to start from the hammerhead side,as it forms then a sturdy place to jam the axe head and therefore its easy to see the other ends places for seams easily.
I added a blade protective piece too.
5.
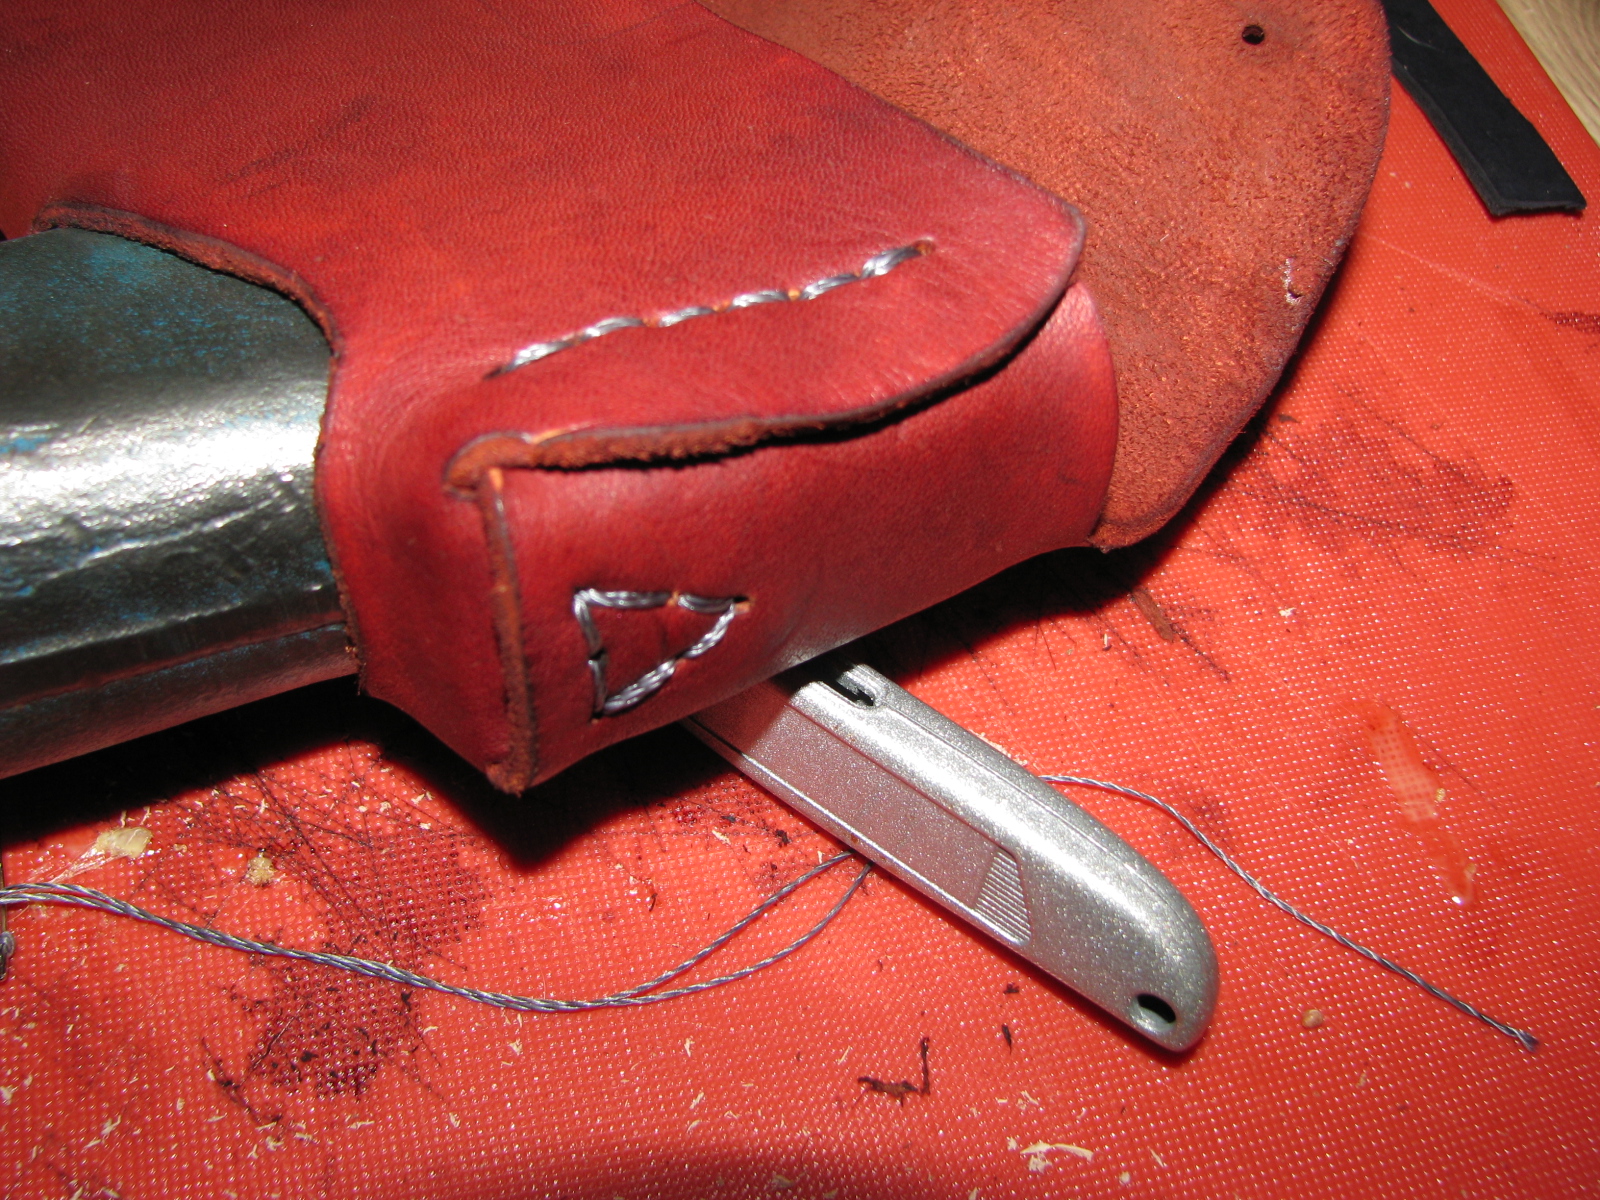
More stitching and riveting...its starting to look like something. I would have used more sewing but i ran out of thread. It would have looked a LOT better with stitches,but rivets do make it easy and sturdy too,as you wont cut rivets loos elike you would maybe do to sewn seams. But for looks,seams are way to go in my opinion. But this is intended for actual carry and work so the rivets arent a big sin.
After youve done your fitting and careful tight joints,you can still cut of excess material,and trim the edges like you want to. I removed a small piece of leather under the flap,to have better grip on the blade to remove the axe easier. The last thing i suggest to do,is to add the desired flap closing stuff,from buckles to buttons. this way it will fold and lock snugly.
6.
Its pretty much ready,and only needs to be oiled & waxed,or whatever you want to use for finishing,i preferred heavy cover of beeswax-oil that nourishes the leather and helps it survive from rain and minus temperatures. I try to avoid any synthetic stuff on these jobs always,they give you nice shine and all but they arent as friendly to the leather as are the natural oils and waxes.
Thats all,i hope somebody might find this useful.